Last Updated on June 30, 2022
In many ways, a properly operating engine is quite a marvel to behold. This is especially true when one considers the complexities associated with the design of the internal combustion engine as a whole. When firing evenly on all cylinders, an engine reaches its peak level of efficiency, producing optimal output for its particular configuration.
However, on occasion, specific issues arise, which prove detrimental to overall engine performance. This is the case when an engine experiences a fuel system-related fault, of one sort or another. A lack of fuel contribution to one cylinder or another can easily cause engine imbalance, resulting in a lack of operating efficiency.
Luckily, most modern vehicles provide some level of indication as to the source of such issues, in the form of active diagnostic trouble codes. One such example is DTC P0201, which is indicative of an injector circuit issue and is often associated with a general lack of performance.
Read on to learn more about diagnostic fault code P0201, as well as how to remedy such issues, should they arise in the future.
What Does Code P0201 Mean?
Diagnostic trouble code P0201 is indicative of an issue within an engine’s #1 fuel injector circuit. In most cases, an issue of this type effectively limits an engine’s ability to supply fuel for combustion to the affected cylinder.
However, to better understand the gravity of DTC P0201, one must first familiarize themselves with the principle of modern fuel injector operation.
The fuel injectors utilized by the modern internal combustion engine rely upon an electrical signal delivered by a vehicle’s ECM/PCM. Each injector features a dedicated wiring pigtail, through which this signal is delivered.
In most cases, fuel injectors are fed a steady supply voltage at any time in which a vehicle’s ignition is in the “ON” position. However, a particular injector is not fired until fed a ground signal by the above-mentioned engine management software.
In the event of DTC P0201, an engine’s ECM/PCM has determined that this previously mentioned circuit has been compromised. This, in turn, severely limits the operation of the affected injector, until the underlying issue is remedied.
Symptoms of Code P0201

Diagnostic fault code P0201 is often accompanied by a number of secondary symptoms. Recognizing these symptoms can prove valuable when attempting to diagnose and repair the root cause of your engine’s ailment, in the most timely manner possible.
The following are several of the most common symptoms associated with diagnostic trouble code P0201.
- Check engine light
- Erratic idle
- Misfire under load
- Stifled acceleration
- Stalling
Causes of Code P0201
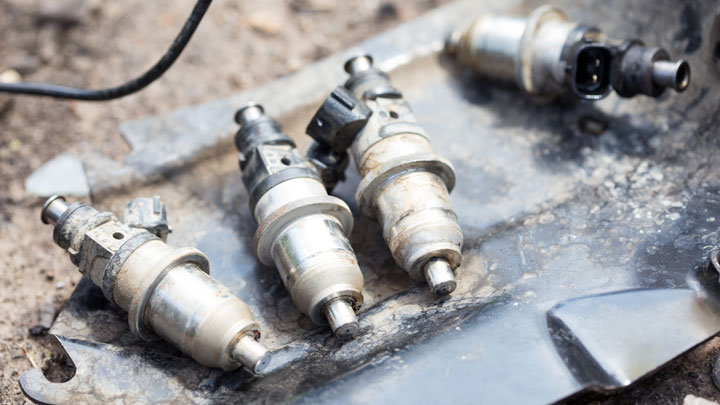
Diagnostic trouble code P0201 can be caused by several different underlying issues, each of which tends to vary in severity. Understanding these potential issues often proves to be a virtue when attempting to level out your engine’s performance.
The following are several of the most common causes of diagnostic trouble code P0201.
- Faulty injector
- Shorted injector wiring
- Open condition in the injector wiring circuit
- Poor electrical connection at the injector
- Failing ECM/PCM
Is Code P0201 Serious?
Diagnostic trouble code P0201 is generally considered to be moderately serious in nature. This stems from the numerous driveability-related symptoms associated with a fault of this particular type. In most cases, DTC P0201 is accompanied by a noticeable misfire, as well as a detectable loss in overall engine performance.
However, the most troubling of symptoms associated with DTC P0201 involves stalling. Though quite rare, an issue of this nature can cause a vehicle to stall when coming to a stop in traffic. This is never a good scenario, and can even prove hazardous if your vehicle were to stall before coming to a complete stop.
In any event, the root cause of DTC P0201 should be adequately diagnosed and repaired at the first available opportunity. Doing so will minimize the risk of hardship associated with the above-mentioned symptoms.
If you do not feel comfortable undertaking such a task yourself, schedule an appointment with a trusted automotive service center as soon as possible.
How to Fix Code P0201

The following steps can be used to assist in diagnosing and repairing the root cause of your vehicle’s P0209 diagnostic trouble code. As always, it is advisable to consult factory-specific service literature for your particular vehicle before attempting any such repairs.
#1 – Check For Additional DTCs
Before beginning the diagnostic process, check for the presence of any additional diagnostic trouble codes. Any such codes should be thoroughly diagnosed before proceeding.
#2 – Perform Visual Inspection
Begin by thoroughly inspecting the wiring pigtail associated with your vehicle’s #1 fuel injector. Carefully check for any signs of fraying or other obvious damage. Also check to ensure that the connector to your engine’s #1 fuel injector is secured, and free of damage.
#3 – Check Injector Resistance
Next, check the internal resistance of your engine’s #1 fuel injector, with the use of a digital multimeter. Compare your readings to those specified by your vehicle’s manufacturer. If this reading falls outside of specification, replace the affected fuel injector.
#4 – Verify Power Supply
You will now check for proper supply voltage at the connector for your engine’s #1 fuel injector, with the use of a digital multimeter. This test is to be conducted while the vehicle’s ignition is in the “ON” position.
In most cases, this voltage should be between 10V-11V. If this is not the case, begin tracing circuit wiring back to the engine’s ECM/PCM, while checking for obvious signs of damage.
#5 – Swap Injector
If supply voltage was present as specified above, swap your engine’s #1 injector with an injector of another cylinder. Start the vehicle’s engine, and check to see if this code switches to the same cylinder in which the injector was moved. If so, replace this injector and repeat the testing above.
#6 – Check For Proper ECM/PCM Operation
If DTC P0201 remained present during step #5, check for proper operation of your vehicle’s ECM/PCM circuit driver, in accordance with factory recommended protocol. This will verify the integrity of the ECM/PCM driver circuit as a whole.

