Last Updated on January 17, 2022
Cars, trucks, and SUVs utilize a network of control modules, sensors, and wiring to enable a host of self-diagnostic capabilities.
This “network” makes it possible for today’s engines to operate with a much higher degree of efficiency than previously possible. As such, engines now idle smoother, produce more power, and operate with minimal emissions output.
However, sensors found within this network do fail on occasion, often leading to the illumination of a check engine light. When this occurs, a fault code is also stored, serving to earmark the general point of failure within a vehicle’s communication network. These fault codes can also be used to assist in the diagnostic process itself.
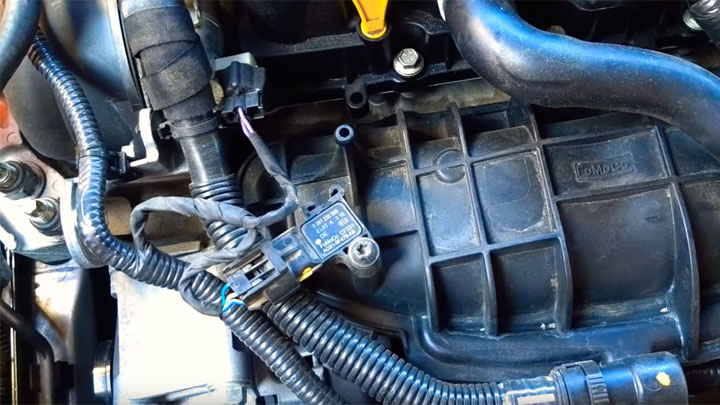
One common fault code often observed by motorists and mechanics alike is DTC P0108. This code relates to an engine’s manifold absolute pressure sensor, and its corresponding circuit. This sensor plays a critical role in measuring and recording engine vacuum, which in turn, is used to facilitate efficient combustion.
Read on to learn more about diagnostic trouble code P0108, as well as how to diagnose such an issue if it is encountered in the future.
What Does Code P0108 Mean?
Diagnostic trouble code P0108 is indicative of a manifold absolute pressure sensor circuit fault. More specifically, the affected vehicle’s PCM/ECM has determined input from this sensor to be irrational, or exceedingly high under the given circumstances.
To further understand the complexities of this fault, one must first familiarize themselves with proper MAP sensor operation.
Today’s engines feature MAP (manifold absolute pressure) sensors, which measure the vacuum within the engine itself. This vacuum is then relayed to the vehicle’s PCM in the form of a voltage reading.
As vacuum increases, circuit voltage decreases. In fact, a properly functioning MAP sensor should provide a reading of approximately 1.5 volts at idle, yet read roughly 5 volts at full-throttle.
In the case of diagnostic trouble code P0108, a vehicle’s PCM/ECM has determined that the MAP sensor circuit is providing excess voltage for the corresponding engine load. This, in turn, simulates a low vacuum scenario. As such, engine operation can be negatively impacted, often to a severe degree.
Related: Code P0106, Code P0107
Symptoms of Code P0108

Diagnostic trouble code P0108 is often accompanied by a host of symptoms, many of which relate to vehicle driveability, or a lack thereof. While not all of these symptoms will be present in every case, most are common enough to warrant understanding.
The following are several of the most common symptoms associated with DTC P0108.
- Check engine light
- Hesitation or stalling
- Poor or irregular idle
- Reduced fuel economy
- Black or dark-colored exhaust smoke
Causes of Code P0108

Diagnostic trouble code P0108 can come as the result of several different root causes. Understanding these potential causes often makes it easier to repair the issue at hand, saving both time and effort along the way,
The following are several of the most common causes of DTC P0108.
- Faulty MAP sensor
- Shorted or open wiring in MAP sensor ground, signal, or reference circuits
- Severe vacuum leak
- Internal engine damage, resulting in loss of vacuum
Is Code P0108 Serious?
In general, diagnostic trouble code P0108 is considered to be rather severe in nature, due primarily to the numerous effects that such a condition can have on a vehicle’s driveability.
Issues of this nature can lead to vehicle stalling or rough/erratic idling. A vehicle’s fuel economy also tends to suffer quite substantially, at the hands of such a condition.
Simply put, DTC P0108, and the underlying condition which it represents, marginalizes a vehicle’s reliability, and can even leave one stranded without recourse. This, in a sense, also presents a safety hazard to a certain degree.
At the very least, one’s peace of mind is greatly reduced, when operating their vehicle with an active P0108 trouble code.
In any event, the root cause of diagnostic trouble code P0108 should be diagnosed and repaired at the first available opportunity. Doing so prevents a vehicle from suffering additional damage, and minimizes a motorist’s chance of becoming stranded.
If you do not feel comfortable handling such repairs yourself, schedule an appointment with a trusted service center as soon as possible.
How to Fix a Code P0108

The following steps can be used to assist in diagnosing and repairing the root cause of a vehicle’s P0108 trouble code. As always, be sure to consult factory-specific service literature for your particular vehicle, before tackling such repairs.
#1 – Check For Additional Trouble Codes
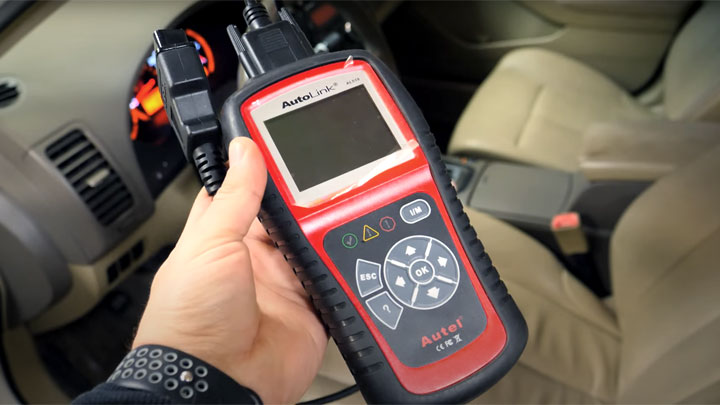
Prior to beginning the diagnostic process, be sure to check for the presence of additional DTCs with a quality scan tool. Any such codes should be thoroughly diagnosed and repaired before proceeding.
#2 – Perform Visual Inspection
Begin by carefully inspecting your engine’s MAP (Manifold Absolute Pressure) sensor, and all corresponding wiring. All defects noted should be repaired before continuing with the diagnostic process.
#3 – Compare KOEO MAP and BARO Readings
Next, compare the readings from your vehicle’s MAP sensor and barometric pressure sensor, while in a KOEO (key on, engine off state). These readings should be within .5 volt of each other. Greater variances likely indicate a faulty MAP sensor.
#4 – Check Voltage At Idle
Start your vehicle and check MAP sensor voltage at idle, with an appropriate scan tool. This voltage should measure approximately 1.5 volts. If these readings are within specification, inspect all engine vacuum hoses for signs of damage or dry-rotting.
#5 – Verify Engine Vacuum
If the above voltage exceeds 4-volts, check the engine vacuum with the use of a vacuum gauge. Readings below 15 in. Hg are indicative of internal engine wear, or a severe vacuum leak.
Readings above this mark are within the acceptable range and warrant further testing.
#6 – Check For Circuit Response
Next, unplug your vehicle’s MAP sensor, and look for any changes in voltage with the use of a quality scan tool. A “No Voltage” reading should be presented.
If this occurs as expected, check all circuits and PCM grounds. If a voltage reading is presented, proceed to step #7.
#7 – Isolate MAP Sensor Signal Wire
You will now isolate the MAP sensor signal wire from its respective connector at the PCM. Repeat the testing outlined in step #6. If voltage readings persist, a faulty PCM is the likely culprit.
However, a loss of voltage is indicative of a shorted MAP sensor signal wire. This short should be located and repaired.


