
Last Updated on November 3, 2022
Today’s vehicles rely upon an intricate web of sensors, wires, and modules to promote efficient operation. The data shared through this network is processed by a vehicle’s ECM/PCM and is used to calculate figures such as injection timing, as well as injector pulse width.
As a side benefit of this data transmission, today’s highly efficient vehicles run far cleaner than ever before. This is largely due to the ability of most engines to figure the correct air/fuel ratio under any particular load, with a high degree of precision.
A series of oxygen sensors are used to detect overly rich/lean exhaust conditions, thereby making it possible to remedy such conditions on the fly. However, oxygen sensors are prone to failure with time, presenting numerous issues along the way.
Such issues are often brought to light with the sudden illumination of a check engine light on a vehicle’s instrument cluster, which signifies that an active diagnostic fault code has been stored. Of these O2 sensor-related fault codes, perhaps none are as prevalent as DTC P0137.
Read on to learn more about DTC P0137, as well as how to remedy such issues, should they occur.
What Does Code P0137 Mean?
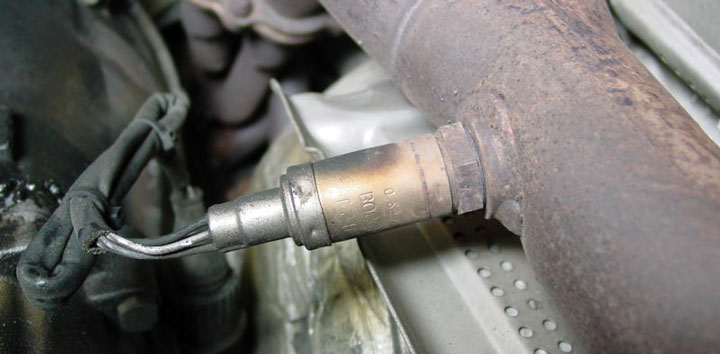
Diagnostic trouble code P0137 indicates that the #2 oxygen sensor, located along bank 1, is producing lower than expected voltage. Code P0131 is for the #1 oxygen sensor.
Typically, this voltage must fall to below 450 millivolts for a period of 20 seconds or more. This signifies that an engine’s #2 O2 sensor is incapable of providing reliable feedback to the engine’s ECM.
Since the #2 oxygen sensor is located downstream of a vehicle’s catalytic converter, the engine in question is unable to determine downstream exhaust values. As such, an engine’s management software is hindered from gleaning an accurate picture of combustion efficiency on the affected bank.
Related: Code P0134, Code P0135, Code P0136, Code P0138, Code P0140, Code P0157, Code P0160
Symptoms of Code P0137
A number of symptoms can be associated with diagnostic trouble code P0137, though these symptoms often vary on a case-by-case basis. The following are several of the most common symptoms related to DTC P0137.
- Check engine light
- Strong exhaust smell
- Possible exhaust leaks
- Rough or erratic idle
- Lack of power when under acceleration
Causes of Code P0137
Diagnostic trouble code P0137 can be caused by a number of different conditions. The true root cause of such an issue can only be confirmed by way of a thorough diagnosis.
However, the following are several common causes of code P0137 that every motorist should be aware of.
- Failed O2 sensor
- Exhaust leaks
- Restricted fuel flow or reduced fuel pressure
- Shorted O2 sensor wiring.
Is Code P0137 Serious?
As a general rule, DTC P0137 is viewed as being moderately serious in nature. Though a vehicle carrying this code can almost always be driven, it is advisable to do so only when absolutely necessary.
Since an engine’s O2 sensors ultimately determine downrange combustion efficiency, inoperable components of this nature can let much go undetected.
If an engine were to run lean for an extended period of time, undetected by an ailing oxygen sensor, severe damage can occur. In fact, such a condition can lead to increased internal component wear, burnt pistons, and valve damage. In turn, a complete tear-down could be necessitated.
In any event, a vehicle with an active P0137 DTC should be taken to a trusted automotive service center, as soon as possible.
How to Fix a Code P0137
The following steps will assist you in diagnosing and remedying the root cause of your vehicle’s P0137 diagnostic trouble code. Additionally, it is always advisable to consult factory-specific service literature for your particular vehicle.
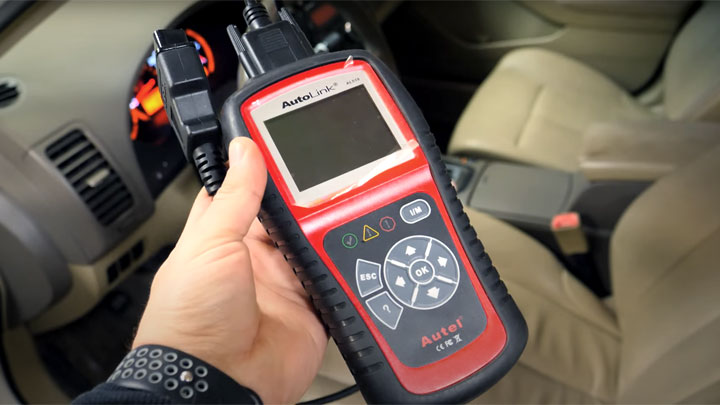
#1 – Check For Additional Trouble Codes
Before beginning the diagnostic process, it is important to verify that no other active trouble codes have been stored. If additional codes are present, each should be thoroughly diagnosed to rule out any possible correlations.
#2 – Locate and Physically Inspect Sensor
Next, you will locate the #2 oxygen sensors (bank 1). Upon locating this sensor, check for the presence of damaged, pinched, or frayed wiring. Likewise, check to ensure that the sensor’s connector is securely latched.
Any defects that are observed should be remedied before continuing.
#3 – Check For Exhaust Leaks
It is also important to rule a severe exhaust leak out as the root cause of your vehicle’s issues. This can be accomplished with the use of a smoke machine.
When plumbed into the vehicle’s exhaust tract, smoke will billow from any points of leakage. Any such leaks should be remedied before continuing.
#4 – Check Fuel Pressure
With the use of a fuel pressure gauge, check to ensure that your vehicle has proper fuel pressure when at idle. Recorded pressure readings should mimic those found in factory-specific service literature.
#5 – Locate Vacuum Leaks
Unmetered air, such as that which is permitted into an engine through a vacuum leak, can ultimately lead to a lean condition. Therefore, it is essential to locate and repair all vacuum leaks found at this time.
In any event, a smoke machine can be used to locate such leaks with a great deal of accuracy.
#6 – Perform Voltage Check
You will now warm your vehicle to operating temp and prepare to perform an O2 sensor voltage check. Unlike an upstream oxygen sensor, #2 oxygen sensors do not fluctuate voltages on an ongoing basis. Instead, an operable #2 O2 sensor should display subtle voltage fluctuations only.
In general, readings of this nature should fall between .1V-.95V, though readings in the .5V range tend to be average. Any out of spec rating during such testing warrants sensor replacement.
")
")
")